Phase One: Collect Underpants Install Solar Panels
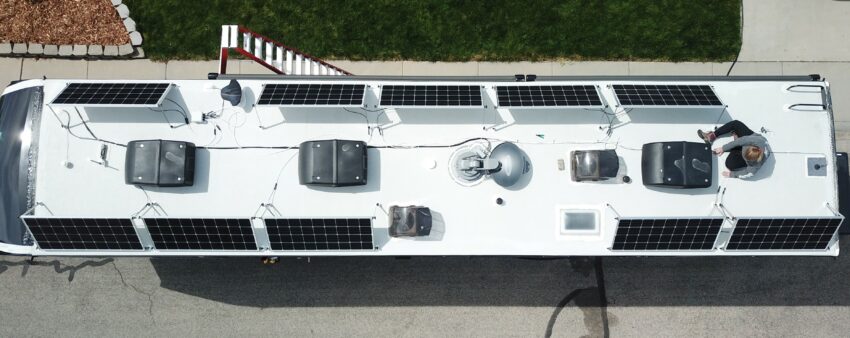
Here’s the roof diagram again:

They are Grape Solar 180 watt panels. They were the best bang for the buck for us, the form factor was correct, and they are assembled in Eugene, OR.
Home Depot is even a distributor!
https://www.homedepot.com/p/Grape-Solar-180-Watt-Monocrystalline-PV-Solar-Panel-for-Cabins-RV-s-and-Back-Up-Power-Systems-GS-STAR-180W-US/301024442
After dinner one night we assembled the panels on the ground in the garage, putting the mounts on them we purchased that will allow us to use tilt bars so we can angle them when needed.
The next day we rented a man lift, to help make it easier to get the panels on the roof. It was a great decision. We figured if the cost of the man lift rental was less than the cost of one of our panels to replace, it was worth it so we would reduce our chances of breaking something.
After getting the panels on the roof and mounted, it was time for wiring. We initially ran them in series/parallel (two series strings of five panels tied together in parallel at a combiner box before they went in the trailer) when we realized our solar charge controller that we originally planned for was not large enough for the wattage we were going to be bringing down. So, we ended up purchasing another charge controller and just using the two strings of five in series alone.
And finally, after some rewiring and cable management, the roof panels are done! After some testing, we were seeing 110+ volts on each side, and the solar conditions weren’t at their best, which means that number could improve.
More to come!


